SmithCart T-HUB Setup Instructions
Section 1 – Copy the Smith Cart Thub Web Service to your web server
1. Download “SmithCartTHubDeploy.zip” web service zip package. Please contact Smith Consulting for help locating and uploading to your site.
2. Extract the contents of the zip file to your local hard disk
3. On your web server create a folder titled “SmithCartThubService”.
4. FTP or copy the file structure you extracted in item 2 above to the web server folder you just created in item 3 above. Note: Make sure the web.config file is in the root of your web site on your server.
Section 2 - Setup a new website in Internet Information Server (IIS7)
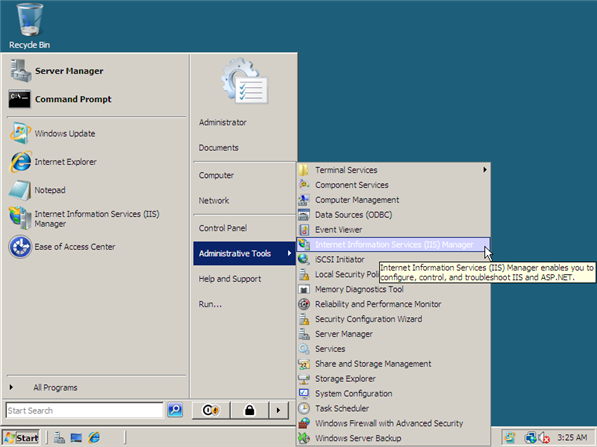
1. Go
to the Server Manager and open up the IIS manager. You can do this by
going to Start -> Administrative Tools -> Internet Information Services
(IIS) Manager.
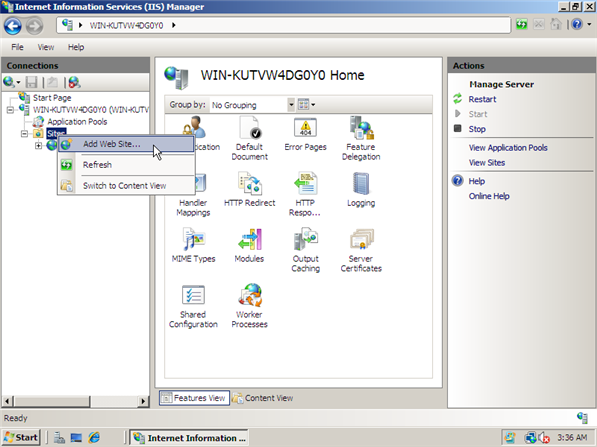
2. Once
IIS Manager opens, expand out the web server and then expand the Sites folder.
Right click
on sites and then click on Add Web Site.
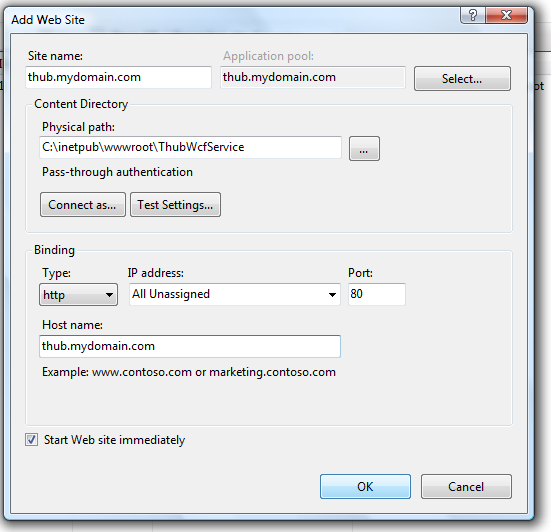
3. In the Add Web Site window fill out the following information for the new site:
· Site Name – Name of the site, this will be either yourdomain.com or *.yourdomain.com (Where * would represent a sub domain name such as www or thubservice). For example, the site name you enter would be as follows “thubservice.yourdomain.com”
· Physical Path – The location on the server that will hold the files for the Smith Cart Thub Web Service. If you did not set this up beforehand you can create a folder through this interface.
·
Type – choose either http or https depending on whether you want
the data transmitted between Smith Cart and Thub to be secured using Secure
Socket Layer (SSL) certificate
or not. Since credit card information is not being transmitted it is not
required to use SSL.
·
IP Address – From the dropdown you can specify what IP the web
service should answer on or use the default switch of “All Unassigned”. If you
have multiple IP addresses, you can simply choose the one you wish to assign to
the website as well. Lastly, if you need to change the IP address, you can do so
by going back and clicking on binding’s, which will take you to
the section that allows IP address changes.
· Host Name – Enter the domain name of web service. For example, “thubservice.yourdomain.com”
Section 3 – Update the web.config file on your web server
1. Locate the web.config file that you copied to your server in step 1 and open it in your favorite editor
2. Scroll down to line 25 and you will see the following “AppSettings” section:
<appSettings>
<add key="ConnectionString" value="Data Source=yourservername\SQLEXPRESS;Initial Catalog=DNN49Cart390;User ID=sa;Password=*********"/>
<add key="UserID" value="MyLoginID"/>
<add key="Password" value="MyPassword"/>
<add key="ObjectQualifier" value="dnn_"/>
<add key="PortalID" value="0"/>
</appSettings>
3. Update the database connection string with the correct credentials to access your database
<add key="ConnectionString" value="Data Source=yourservername\SQLEXPRESS;Initial Catalog=DNN49Cart390;User ID=sa;Password=*********"/>
The following items highlighted in yellow need to be updated in the “Connection String” key:
· Data Source=YourServerName
· Catalog=YourDatabaseName
· User ID=YourDatabaseUserName
· Password=YourDatabasePassword
4. Update the following web.config keys highlighted in yellow below:
<add key="UserID" value="MyLoginID"/>
<add key="Password" value="MyPassword"/>
<add key="ObjectQualifier" value="dnn_"/>
<add key="PortalID" value="0"/>
Definition of keys above:
· UserID – This is the UserID that Thub uses to authenticate to the Smith Cart Thub Web Service. This is the UserID that you entered in the Thub “Online Store Cart Settings”
· Password – This is the Password that Thub uses to authenticate to the Smith Cart Thub Web Service. This is the Password that you entered in the Thub “Online Store Cart Settings”
· ObjectQualifier – When you install DotNetNuke (DNN) you have the option to add an objectqualifer prefix to your database objects. Replace the objectqualifier key “dnn_” with your objectqualifer. If you did not select an objectqualifer when you installed DNN then you enter value=””
· PortalID – Enter the portal ID for your DNN portal that you are running Smith Cart in.
5. Save - After updating the items above save your changes.
Section 4 – Testing the Smith Cart Web Service
1. Navigate to the folder on your server that you copied the Smith Cart Thub web service files to in Step 1 and you will see the following 2 test pages:
· thub_getOrders_test.html - Test page for the get orders service
· thub_updateShipStatus_test.html - Test page for update ship status service
2. Open “thub_getOrders_test.html” in your favorite editor and go to line 4. Change the domain name (highlighted in yellow below) in the post url with your domain name:
<form action="http://thub.mydomain.com/Service1.svc/getOrders" method="post">
3. Open “thub_updateShipStatus_test.html” in your favorite editor and go to line 4. Change the domain name (highlighted in yellow below) in the post url with your domain name:
<form action="http://thub. mydomain.com/Service1.svc/getOrders" method="post">
4. Save - After updating the items above save your changes.
Section 5 – Configuring Thub to communicate with the Smith Cart Thub Web Service
- Open T-HUB client application
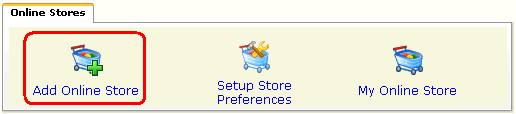
- Click on the “Add Online Store” icon under Online Stores tab.
- Select “Custom Cart – Direct” as Store type (shopping cart) list.
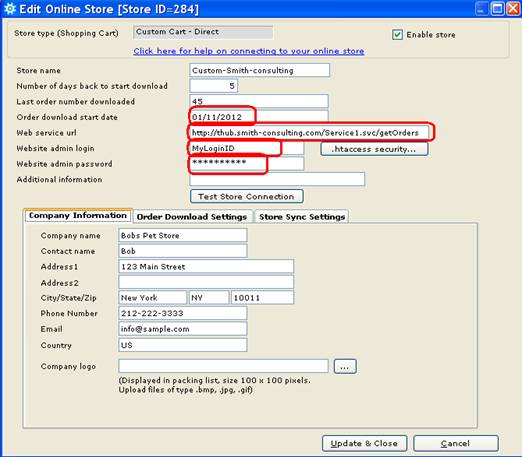
- Enter the Order download start date. This is the date from which orders will be downloaded from your online cart.
- Enter the web service url as shown in section 4 above
- Enter the Admin login and password as shown in section 3 step 4.
- Click on Test Store Connection. If all the parameters are correct you should see a message like store successfully connected.
- Click Save & Close to close the add online store form.
- Click on Process Orders icon in T-HUB
- Click on the download orders icon highlighted below. This will start the order download from your website. Depending on the start date entered above and the number of orders on your website, this process may take a few minutes…
![]()